Wednesday, November 17, 2010

Squash Carmelli with Brown Butter and Sage


Hi friends!

I have the most simple and delicious recipe to share with you tonight. It's really wonderful on a blustery, chilly day, and amazing for lunch the day afterwards! I'm talking about beautiful home made pasta, filled with hearty squash, fresh sage and smothered in nutty brown butter and a bit more sage. Yum! The word carmelli describes the cute as a button candly-like shape of the pasta, but really you can shape your pasta however the heck you want to...gigantic rustic ravioli would be tasty!


I don't think people realize how simple making your own pasta can be....especially if you happen to be the proud owner of a pasta roller! However, even if you don't have a roller, it's still extremely simple. All you need are eggs and flour!

Before I get too ahead of myself talking about home made pasta, I better talk about how to create this dish!

 It's easiest to cook the squash you're using before starting on anything else. You can really use any type of winter squash you'd like to, but I used carnival and buttercup squash, simply because that is what we had in the cupboard!


Preheat the oven to 350 degrees F.
Quarter your squash, and scoop out the seeds.
Place the quarters on a baking sheet and sprinkle with a little bit of water, and salt and pepper.
Now simply throw your squash into the oven and remove them when they are soft throughout. Use a fork to tell if they are or not.
Let the squash cool enough for you to handle on the baking rack!


Next it's time to make your pasta dough! I never really use a recipe, I just pour out as much flour as I think I'll need, and add enough eggs to create a smooth, yet dry dough! I add a few tablespoons of water to bring the dough together if it's a bit too dry. You will want the dough to stick to itself, but not another surface such as a counter, because you'll need to be able to roll it through the pasta roller!


Let the pasta dough sit while you create your filling! Letting it sit allows the gluten to take a break and this will make your dough easier to roll out, and less "springy"!


Using a spoon, I scooped the cooked squash from the skin, then mashed it with a potato masher along with chopped fresh sage, an egg to bind, salt, pepper, and finely grated firm goat cheese! So simple!

Now it's time to roll your pasta!


Whether you're using a roller or rolling the dough by hand with a rolling pin, get it as thin as you can! This will make more tender pasta.


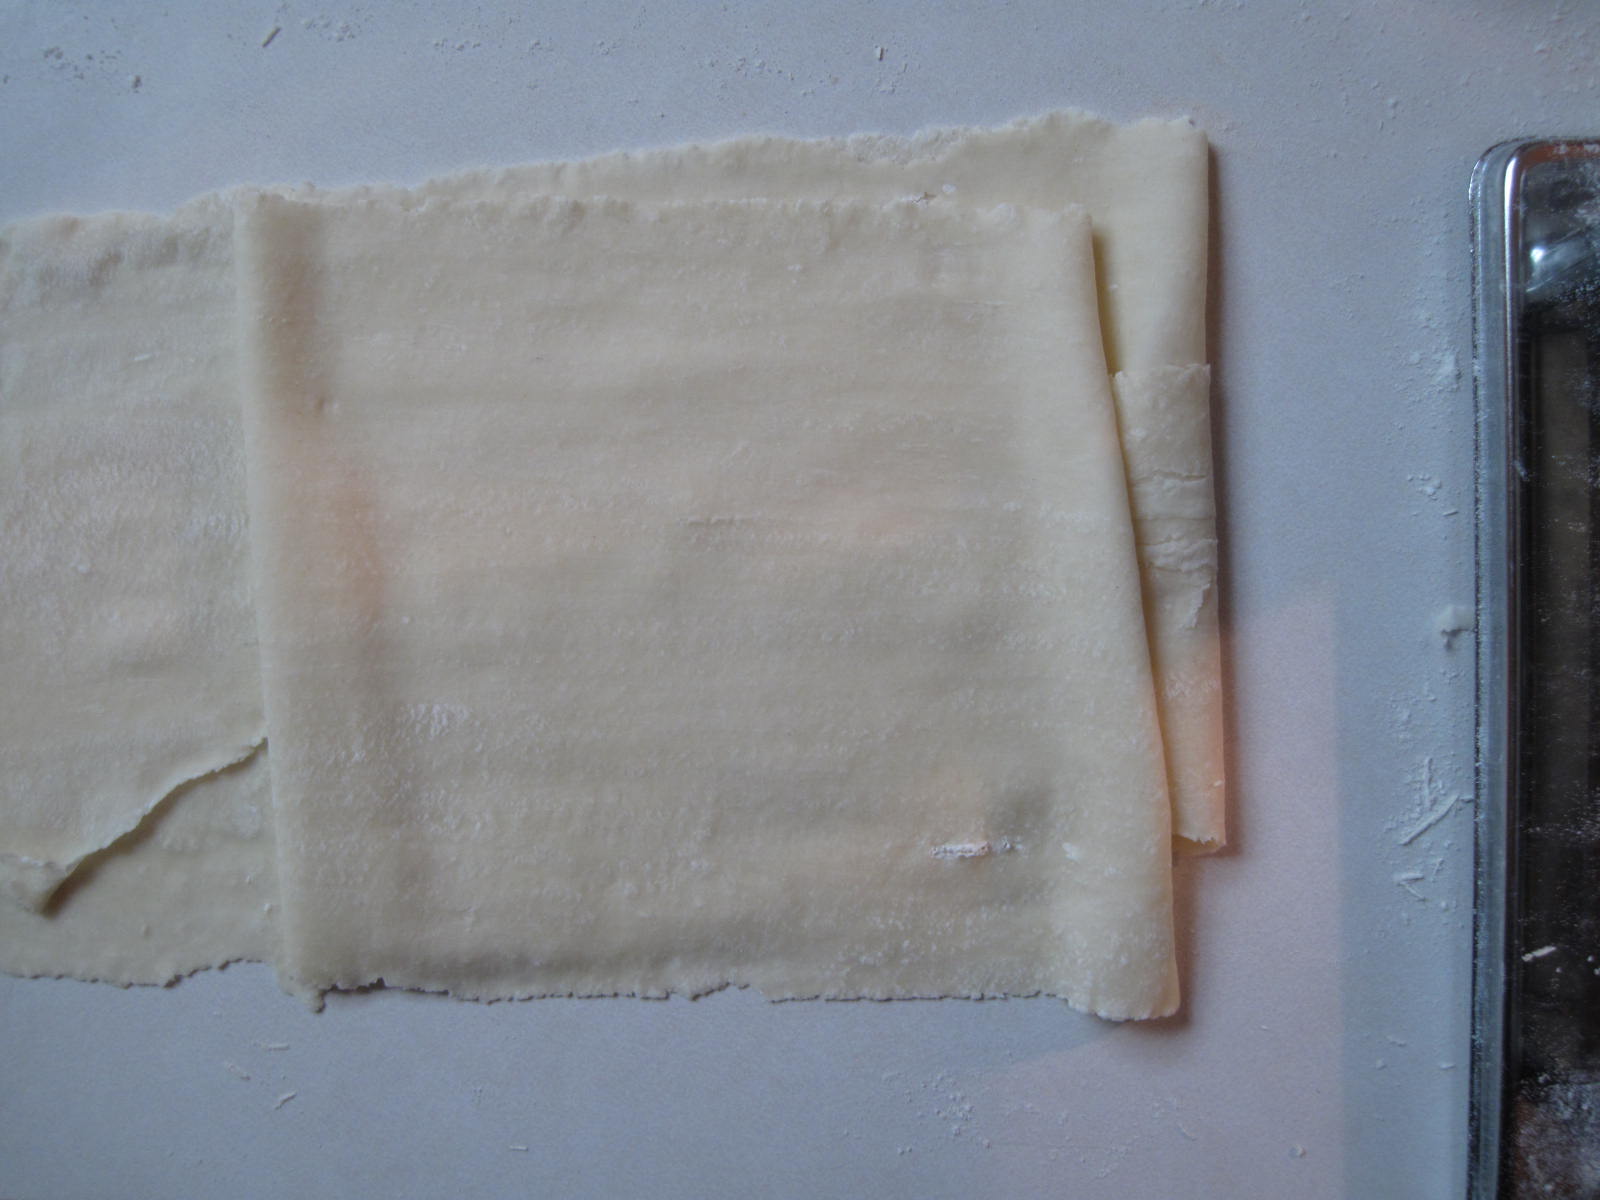
Cut your dough with a knife into little rectangles or squares.


Spoon a little filling into the center of each square, and using your finger, dab a bit of water onto one edge of it, to seal your carmelli.

Roll the dough up, seal it, and twist the ends, like a little tootsie roll!


Next, bring a pot of salted water to a boil, and toss in your pasta! Cook until tender, about 5-10 minutes. Gently drain your little beauties.


While you are either waiting for the water to boil or your pasta to cook, you can make a brown butter and sage sauce to top off your dish. This sauce is as easy as it's name; all that's in it is browned butter and fresh chopped sage!


In a sauce pan, heat as much butter as you'd like, with a little chopped sage, and watch it slowly tuirn golden brown. Watch it carefully and pull it off the stove as soon as it reaches this state! After turning golden it tends to burn quickly. Drizzle this nutty tasting sauce all over your gorgeous home made carmelli, and wait for the compliments to flood in.


Enjoy!

xoxo

Mariel


Monday, November 15, 2010

Pumpkin Cupcakes with Cream Cheese Icing


Hello friends!

I am back! There is nothing more boring than reading in full description why a blogger was absent for forever, so I won’t apologize too profusely. But I will say that I do finally have a new computer and am more excited than ever to start blogging again! This puppy ain't no Mac, that’s for sure…but it will do for now! My life is quite different this year than it was last, I am no longer a full time student…I have a full time job! I am taking one class at the university still…just because, but it’s really (really) lax. All these big changes have come about because of my decision to go to culinary school! I think about it every single day. However, I need a little more than the will to go to get there. That’s why I’m working! I have a few ideas of where I would love to go, but I find myself flip flopping constantly - I am sure you will soon become aware of this, so I won’t name any places quite yet! Anyways, I hope you are all as excited to see me back on here as I am…here’s a recipe for some cupcakes!

Oh yes, and I decided to come back to blogspot. I missed the comments, the communication, the love! I really did. I think this will be a great switch back.


After Thanksgiving, there was an extra can of pumpkin sitting in the cupboard, just tempting me to make some sort of pumpkin laced dessert... I finally decided on something a little plain jane, but nonetheless delicious. Cupcakes with a good ol' dab of cream cheese icing! These little gems did not rise up to normal "cupcake" form, and therefore ended up looking more like muffins...however, once you take a peek at the amounts of sugar in this recipe, you will see that these are no muffins.


Pumpkin Cupcakes

1 cup packed brown sugar
1 cup white granulated sugar
1 cup soft butter
4 eggs
2 cups all purpose flour
1 teaspoon baking soda
1 teaspoon baking powder
1 teaspoon salt
1 teaspoon ground cinnamon
1 teaspoon ground ginger
1/4 teaspoon ground nutmeg
1/4 teaspoon allspice
1 (15 ounce) can pure pumpkin puree

Preheat the oven to 350 degrees F.
Pop muffin tin liners into your pan or pans!
Beat together the sugars, butter and eggs until well combined.
Stir together the flour, baking powder and soda, and spices in the measuring cup or a medium sized bowl.
Add the combined dry ingredients to the wet ingredients, and combine!
Whisk in the pumpkin puree.
Pour batter into the liners about 3/4 full.
Bake cupcakes for about 20-25 minutes or until a wooden toothpick comes out of the center of the fattest cupcakes squeaky clean!


For the icing, I simply beat together a brick of plain cream cheese, a dash of almond milk, and a truck load of icing sugar. It was extremely sweet, hence the heart shaped icing (so you didn't get a full cupcake top's worth of the stuff). To do this, I just loaded my icing into a big zip lock bag, snipped a corner of it, and iced away!


These cupcakes were so moist! I brought them to work and they were all gone by noon, a good sign I'd say!
Enjoy!

xoxo

Mariel

Sunday, October 24, 2010

Back From a Long Holiday!

Hello friends!

I finally purchased a new computer, and here I am. I don't know what to do though. Will you help me decide?!?! As you may know, I had switched my little blog over to Tumblr back when I was still blogging up a storm...but I must tell you, Tumblr was a lonely, lonely little space. No commenting system was just no fun at all. So I feel like I should move back to where I feel I really belong - blogger. Blogger is such a warm, encouraging environment. But should I make switch number 3?!? Or just suck it up and stay on tumblr. Also. Should I start fresh? Delete all my old things and go with "new computer, new noms?" Please help me! I haven't blogged in so long that I am struggling with all these decisions. Regardless though, I am estatic to be able to share recipes and ideas with you all again. Because I can assure you, I've been cooking all this time I've been away, but it just hasn't felt the same not sharing it with you.

Much love,

Mariel

Wednesday, May 5, 2010

Mariel's Noms is Moving!


Hi everyone! I've moved my noms over to tumblr for bigger and better things!


I'm going to keep this blog up and running though so all my recipes can stay up and be ready to be made! Enjoy the new site!

P.S. I put the last post from this blog up on the new one just because I like it and think it deserves a better home!

xoxo

Mariel

Sunday, May 2, 2010

My Friends and Food


Hello everyone! Happy summer (for all you university students)! 

Myself being a university student...I've finally got a ton of time on my hands and my creativity has been going wild for the past couple of days! I've come up with a new "feature" I want to start doing for my blog that I'm super excited about: a series of showcases and interviews of a ton of my interesting friends all about food! From the interviews I do with them I'll then create a recipe just for them/named after them based on their favorite foods and memorable meals!

Anyways, I'll jump right in to my first interview for My Friends and Food, meet my lovely friend Katie! Today was one of the first sunny days in a while, so we went on a nice little hike through the ravine and I bombarded her with a million questions, I'm so happy with the photos and the interview!

Katie! Tell us a little about yourself before we dive into the world of food! 

Well, I just finished my first year of Tourism and Recreation Management in Cranbrook, B.C. I am looking forward to a summer full of fun and adventures (and food) in Edmonton. I'm almost 19 (my birthday is May 21st, yay)! I'm unfortunately working full time as a student painter for the summer...oh painting...and I'm single and READY TO MINGLE!

You definitely are single and ready to mingle, girly! 

Oh absolutely, I'm on the prowl. Kidding!


So, now let's get into the food talk (my favorite). What is your most memorable meal as of late?

Well, on my last night in Cranbrook, me and two of my really good friends had a giant BBQ with, now get this: 64 HAMBURGERS THAT WE GOT LEFTOVER FROM AN EVENT OUR PROGRAM HELD! They were delicious hand made burgers from the cafeteria. It was about 30 degrees out and gorgeous. We went to the local grocery store and picked up ALL the fixings, and started cooking! We obviously didn't eat 64 burgers to ourselves, but made a ton for all our friends still living in residence at the time. It would have been a different story if the burgers were free and not very good, but they were incredible.

So you like meat, that's my girl. What foods do you not like, if there are any?

Mmm...all kinds of fish! I'm not a huge seafood fan. So let's just say anything from the sea. Even fake seafood, my roommates had some imitation crab at one point, it made me sick! Also, I'm not a fan of green peppers. That's about it though!
That's not too bad! Even though I'm a seafood fanatic...but anyways...what about the food you LOVE?

I love sandwiches! Give me a sandwich and I'm a happy person. I love BBQ chicken and fruit, and...starbucks. I love muffins and baked goods...like banana bread! 

What is your dream sandwich? Describe it for us...in extensive detail:

Okay, I'll go layer by layer. The bread will be...sliced marble rye...MMM! I'm already excited. Margarine first, and then a generous amount of mayo. Then we'll start with deli turkey, and then deli ham. Then jalapeno havarti cheese. Oooh then let's add some BACON! Sliced cucumbers...sliced pickles...tomato....fresh cracked black and mustard, then top it off with another piece of rye! Oh that sounds so good right now...


Now you must tell the food blog about a favorite specialty you make for me every time we come home after a night out together...

Well food blog world. There's a special thing called Kraft Dinner. But this is no ordinary Kraft Dinner. First it's boiled to the perfect al dente. Then you make the KD as the box says, but with a GOOD amount of margerine and a little bit of milk. Next, PRAY that you have Kraft Tex-Mex shredded cheese in your fridge. When you do find it, grab a handful (a heft handful) and toss it into your KD. Next, rummage through your freezer for those old hot dogs you have from summers past. And since time is of the essence, throw them in the microwave until they split at the seams...then you know they're ready! Cut those puppies up and throw them in your gourmet pasta, add a little ketchup, a little fresh cracked black and finish with a little extra Tex-Mex. Bon appetite! Oh so yummy.
It really is...this little dish has saved me from quite a few hangovers in the past, thanks girl! So Katie, for your personalized dish made by myself, what would you like to see incorporated into that bad boy? 

Oh my goodness I don't even know...CHEESE! K so cheese...meat...lots of flavour, spice...and colour! And nothing with fish! That's all I can say!

Okay, I'll see what I can do with those requirements! Thanks for being my first "My Friends and Food" subject, Katie! Can't wait to make a recipe with your name on it! I'm so happy you're home for the summer!

So after thinking about what I should do for my "Katie" dish...I've finally come up with something! Here it is!

The Katie

1 1/2 cups elbow macaroni
1-2 spicy italian sausages
1 hot red pepper and 1 hot green (or jalepeno) pepper, diced very finely
4 tablespoons butter, divided
1/4 cup all purpose flour
3 cups whole milk
1 teaspoon dry mustard
3/4 teaspoon salt
a good grind of fresh cracked black pepper
1 cup shredded pepperjack cheese
1 1/2 cups shredded sharp cheddar cheese
1/2 cup grated fresh parmesan cheese
1/3 cup bread crumbs (from old marbled rye bread)

Preheat oven to 375 degrees F.
Bring a large pot of salted water to a boil, and add your pasta.
Cook until al dente, and drain.

While the pasta is boiling, cook your Italian sausages and hot red and green pepper (as much as you'd like) in a frying pan over medium-high heat. When they're done cooking, set aside.

In a large saucepan over medium heat, melt 2 tablespoons of butter and add your flour - whisk together.
A little at a time, whisk in the milk, dry mustard and salt and pepper.
Bring the sauce to a boil for about 1 minute, and then remove from heat.
Add in the pepperjack, cheddar and parmesan and whisk until smooth.
Stir in the cooked pasta to the cheese sauce, and pour into a shallow baking dish.

Now slice your cooled Italian sausage and add this and your cooked peppers into the macaroni and cheese. Mix in.

Finally, take the remaining 2 tablespoons of butter and cook in the same frying pan used to cook the sausages the butter and 1/3 cup of rye bread crumbs.
Sprinkle the bread crumb mixture on top of the macaroni and cheese.
Bake in the preheated oven for about 30 minutes!

So there you are, a dish with colour (the green and red hot peppers, the bright cheeses, the golden sausage and rye crumbs), with meat (spicy italian sausage, a more sophisticated hot-dog), cheese (lots of it) and spice!

Enjoy! I will make this sometime soon and post pictures eventually! But until then, you should try it out for yourself!

xoxo

Mariel

Bagels!


Hello! I've been on a bit of a bread making kick lately (you will see more of this shortly), and recently tried something for the first time ever - making bagels!

This baking project was really fun actually and a bit quicker than full out loaves of bread, and the end results were impeccable. You really need to try your hand at bagel making yourself!


I got the recipe for these bagels from that $4 bread recipe book I purchased from Chapters not too long ago. However, as I was waiting for the dough to rise and flipping through more recipes to see what I was going to make next, I realized something depressing about my favorite little bread book. First of all, I realized it was laden with spelling errors. I don't know how it was even published with so many! I swear I'm not a spelling/grammar nazi, but these little errors made me seriously question the quality of the recipes within! Secondly I flipped to the "traditional" section of my book to check out the "whole wheat bread" recipe to see if I felt like baking up a loaf of that after my bagels. I read the ingredients first, as I always do, and then scrolled down to the instructions. The first line of instructions said to "Mix the yeast, water, sugar and cottage cheese together". As the cottage cheese art of that line sounded a bit odd to me...I quickly scrolled back up to the ingredients list to see if it was there. Well guess what? It wasn't! 
I knew from here on I was going to have to do a lil' improvising with my bagels and play everything by ear...

So here's the recipe I ended up using:

2 teaspoon active drive yeast
1 cup warm milk
4 tablespoons softened butter
1 teaspoon salt
2 tablespoons sugar
1 egg yolk
2 cups all purpose flour

In a mixing bowl, dissolve the yeast in the warm milk.
Add the softened butter, salt, sugar and egg yolk to the mixture and stir in well.
Add the flour a bit at a time until you have a nice soft dough that is "kneadable".
Turn the dough onto a floured surface and knead until smooth and elastic, about 8 minutes.
Place your kneaded dough into a greased bowl, turning the dough ball once to grease the top also.
Cover with saran wrap and let rise in a warm place until doubled in size!


When your dough has doubled (this will take an hour or two), punch it down and shape it into 12 balls.


Push your thumb through the center of each dough ball to form a 1-inch hole.


If you are in search of perfect little bagel shapes at this point in the game, think again! I tried so hard to make perfectly shaped balls and "bagels"...it's just not possible! I was kind of disappointed in how my bagels looked at this point, but it gets better after the boiling and baking, I promise!

Place your shaped dough onto a floured surface and let it rest for about 15 minutes. 
After the 15 minutes, flatten your bagels down a bit.


Now bring a large stock-pot of water to a rolling boil.
Drop your bagels into the pot (not too many, or they'll stick), and let them boil for about 3 minutes before removing with a slotted spoon.


Place your bagels on a greased baking sheet, 2 inches apart.
Also, preheat your oven now to 350 degrees F!


This is the stage where you can add whatever you like to the top of some or all of your bagels!
I sprinkled half of my bagels with the only bagel-ish topper I could find - poppy seeds!


Bake your bagels at 350 degrees for about 20 minutes, or until nicely golden brown.
You can "knock" on your bagels if they're browned but you aren't sure if they're cooked in the middle.
If your bagels sound slightly hollow, they're done!


They turned out! I was so happy, I struggled past some very, very bad instructions...and was rewarded with fresh, delicious, warm bagels to smother in butter. Mmm.


These bagels did turn out, but I think I want to try a different recipe sometime, just to see what it's like! In the meantime though, these were a wonderful and rewarding batch of my first shot at making bagels. Enjoy!

xoxo

Mariel

Saturday, May 1, 2010

Fresh Fruit Smoothies (Bubble Tea Minus the Bubbles)


Hello everyone! So with summer upon us, and nice weather (kind of) on the horizon, my mind has been drifting to sweet, summer flavors. One thing that I had a late night craving for the other night was a big, fresh watermelon bubble tea...mmm. Sadly though, the bubble tea house had been long closed by this time...not like I had any money for one anyways! I looked into the fridge to see that we did in fact have a gigantic, juicy watermelon just waiting to be eaten...so I turned to the internet to find out what their secret is to making fresh fruit boba so damn good! I could deal with a tapioca-less bubble tea for one night, right?

Well...I found their secret. Turns out it's much more simple than I thought it might be...here it is...

A sugar syrup made with both BROWN and WHITE sugar!

That's it!


You take equal parts brown and white sugar, and then an equal part water (for example, 1/2 cup brown sugar, 1/2 cup white sugar and 1 cup of water).
Bring all the ingredients to a boil in a small saucepan over medium-high heat, and as soon as the mixture begins to boil, remove it from the heat!
Let it cool to room temp.
And you're done!


It's so bizarre, but as soon as this little mixture started bubbling, I really smelt the bubble tea house... It really is the brown sugar that is the secret!

The next steps to making a bubble-tea-esque smoothie are chopping up the fruit of your choice (I did watermelon, and then later on got carried away and tried banana). 
Put equal parts chopped fruit and ice in your blender (or magic bullet...).
Fill the blender up with milk to where the fruit stops.
Finally add about a tablespoon or so of your sugar syrup and blend away!


This puppy actually tasted so similar to a watermelon bubble tea! I just need to pick up some tapioca pearls now...


The banana smoothie was okay...it was delicious at first, but then the banana started to "settle" a bit...which wasn't so pleasant.


So there is my recipe for an at-home bubble tea fresh fruit smoothie! I'm going to head to the asian grocery store sometime soon to get the tapioca pearls, and I'll post a real bubble tea sometime soon!

xoxo

Mariel