Showing posts with label Bread. Show all posts

Sunday, May 2, 2010

Bagels!


Hello! I've been on a bit of a bread making kick lately (you will see more of this shortly), and recently tried something for the first time ever - making bagels!

This baking project was really fun actually and a bit quicker than full out loaves of bread, and the end results were impeccable. You really need to try your hand at bagel making yourself!


I got the recipe for these bagels from that $4 bread recipe book I purchased from Chapters not too long ago. However, as I was waiting for the dough to rise and flipping through more recipes to see what I was going to make next, I realized something depressing about my favorite little bread book. First of all, I realized it was laden with spelling errors. I don't know how it was even published with so many! I swear I'm not a spelling/grammar nazi, but these little errors made me seriously question the quality of the recipes within! Secondly I flipped to the "traditional" section of my book to check out the "whole wheat bread" recipe to see if I felt like baking up a loaf of that after my bagels. I read the ingredients first, as I always do, and then scrolled down to the instructions. The first line of instructions said to "Mix the yeast, water, sugar and cottage cheese together". As the cottage cheese art of that line sounded a bit odd to me...I quickly scrolled back up to the ingredients list to see if it was there. Well guess what? It wasn't! 
I knew from here on I was going to have to do a lil' improvising with my bagels and play everything by ear...

So here's the recipe I ended up using:

2 teaspoon active drive yeast
1 cup warm milk
4 tablespoons softened butter
1 teaspoon salt
2 tablespoons sugar
1 egg yolk
2 cups all purpose flour

In a mixing bowl, dissolve the yeast in the warm milk.
Add the softened butter, salt, sugar and egg yolk to the mixture and stir in well.
Add the flour a bit at a time until you have a nice soft dough that is "kneadable".
Turn the dough onto a floured surface and knead until smooth and elastic, about 8 minutes.
Place your kneaded dough into a greased bowl, turning the dough ball once to grease the top also.
Cover with saran wrap and let rise in a warm place until doubled in size!


When your dough has doubled (this will take an hour or two), punch it down and shape it into 12 balls.


Push your thumb through the center of each dough ball to form a 1-inch hole.


If you are in search of perfect little bagel shapes at this point in the game, think again! I tried so hard to make perfectly shaped balls and "bagels"...it's just not possible! I was kind of disappointed in how my bagels looked at this point, but it gets better after the boiling and baking, I promise!

Place your shaped dough onto a floured surface and let it rest for about 15 minutes. 
After the 15 minutes, flatten your bagels down a bit.


Now bring a large stock-pot of water to a rolling boil.
Drop your bagels into the pot (not too many, or they'll stick), and let them boil for about 3 minutes before removing with a slotted spoon.


Place your bagels on a greased baking sheet, 2 inches apart.
Also, preheat your oven now to 350 degrees F!


This is the stage where you can add whatever you like to the top of some or all of your bagels!
I sprinkled half of my bagels with the only bagel-ish topper I could find - poppy seeds!


Bake your bagels at 350 degrees for about 20 minutes, or until nicely golden brown.
You can "knock" on your bagels if they're browned but you aren't sure if they're cooked in the middle.
If your bagels sound slightly hollow, they're done!


They turned out! I was so happy, I struggled past some very, very bad instructions...and was rewarded with fresh, delicious, warm bagels to smother in butter. Mmm.


These bagels did turn out, but I think I want to try a different recipe sometime, just to see what it's like! In the meantime though, these were a wonderful and rewarding batch of my first shot at making bagels. Enjoy!

xoxo

Mariel

Tuesday, March 30, 2010

My First Loaf of Bread

Hello everyone! I've got a nice hefty post for you today...it's all about my big baking extravaganza with bread!

It all started with a little stroll into Chapter's with about $10 in my pocket...

I immediately ascended the escalator up to my favorite section: the bargain cookbooks. Big, bold "$14.99" stickers caught my eye left right and center on gorgeous, thick "country recipes", "moroccan cooking" and "1001 cupcakes" books. Today was not a day for splurging though... I made my self comfortable in the spot of the shelf that was a little more affordable...by sitting cross legged on the surprisingly clean carpet. Usually a sucker for all things flashy, something bizarrely plain caught my eye this day - a little coiled bread recipe book (with barely any photo's even)...for $4.99. Right in my price range. That's right everyone, I actually went for substance! This little book holds more bread recipes than I can count, plain and extravagent, I was ready for a challenge.


I got home thoroughly excited and immediately whipped out the yeast and got started. I knew what I wanted to make as soon as I saw the recipe in the book - challah bread.

You see, ever since my trip to Aunties and Uncles, I've been challah crazy. It's hard to get off my mind every time I settle for a piece of plain old toast...try it, you'll see what I mean.


Challah Bread

2 packets of active dry yeast
1/4 cup of warm water
1 cup lukewarm milk
3/4 cup of brown sugar
1 tsp of salt
3 eggs
1/2 cup of softened butter
5 1/2 cups all purpose flour
1 egg

First of all, dissolve the yeast in the 1/4 cup of warm water, make sure there are no gluey bit of yeast! It all dissolves eventually with a bit of patient stirring.
Stir in the milk, sugar, salt, 3 eggs, butter and 3 cups of flour.
Beat until smooth.


Keep stirring in flour, bit by bit, until the dough is easy to handle.
Turn it out onto a lightly floured surface when it looks like this:


Knead until smooth and elastic, about 6 minutes. 
Throw the dough on the counter as hard as you can, fold it over on itself repeatedly, punch it - go crazy on that hunk!
Next, place your smooth and elastic dough in a lightly greased bowl, making sure to cover the entire dough ball in a little grease.


Wrap your bowl with plastic wrap and set it in a warm spot to rise until doubled in size. I put my bowl under the hot lights above the stove, it was perfect.

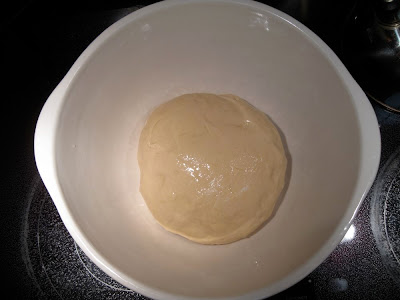
Look at this dough rise! It's very exciting...


The rising process should take about 2 hours.


The dough is ready to go if an indentation remains when touched!


Punch down your risen dough once again and cut it in half, like so:


Do a little more kneading (not too much at all) and form your dough into two slightly flattened circles.
Place these in greased round 9x2 inch layer cake pans, and cover and let rise until doubled again, about 1 hour this time.
(So exciting)


When your dough is looking fluffy and pretty once again, preheat the oven to 350 degrees F.
Whisk one egg and brush it on the top of your loaves, followed by a bit of sprinkled sugar.
For one of my loaves I cut an "X" into it just to see how it would look...next time I'd definitely do this to both loaves! It looks so lovely and rustic when they were baked.


Pop in the oven for 35-40 minutes, or until golden brown, and voila, beautiful, fresh, delicious smelling, sweet, soft challah!


Here's that pretty "X" i was talking about!


The house smelled so wonderful that I couldn't help myself from cutting into the fresh from the oven bread for a slice to smother in butter.


Let me tell you, this slice was absolute heaven. And I made that bread myself? I can't quite think of anything more satisfying that I've ever made.


So buttery and flakey and eggy...mmm....challah.


So there you have it! My first loaf (loaves) of bread, ever. This was a very successful baking adventure! I cannot wait to try more recipes from my new little book.

xoxo

Mariel